Tuesday, December 23, 2014

Christmas makeup

Well i've never made any kind of video, but i decided to give it a go, cause it's some kind difficult to try to explain how to make a makeup tutorial just written.
this is a photo of how it all turn out


Thursday, October 30, 2014

what I've been doing lately

Well to start, I gotta say that I have started the university almost 3 months ago , and it have been amazing, thus is what i was meant to study since the beginning.
I know that I haven't been on lately, but I was adjusting to study again, cause when I finished high school I took a year and a half to travel,  and to know me better, tk discover knew things about me, and let me tell you, It was a good thing in a way, I wont tell a lot of things but it.
Now I've kind of figure out everything about studing and stuff, so I'm gonna start posting more since now, I am starting to look for topics, well themes that would be interesting to talk sbout, oh and also I have an account on polyvore: dearfahion-andreaaquije, you should go and see it I have a lot of sets that I think you would like it, and also I have discovered that I can post them in the blog so I'm posting them in here to. Also I forgot to tell you that I have an instagram and its dearfashion123
So this is all you'll hear from me soon ;)

Saturday, August 2, 2014

How to: Cara Delevingne makeup look


The first thing that we have to do is putting on our foundation and here i found an image that shows where do we have to put the highlighter, bronzer the blush.


EYE: 

Tips: if you want it to last a lot more than a couple of hours, you must put on first some primer


1. After applying primer, put on a coat of some really light shade in all the eyelid. ( this would make it easier for the other shadows to blend, and also it would make the colors look better)
2. Apply a brownish going to orange shade in the outer v, the crease and also the inner corner of the eye.
3. Now apply a little bit darker shade to the outer crease of the eye to add depth.
4. Use the shade of step 3 and mix it with the one of step 2 and take it to under the waterline.
5. Apply the darker brown to the outer v of the eye.
6. Put some black liner on the waterlines, and also put on some black mascara to the lashes.

These are the shades that i used:


1.

2.

3.

4.
+


LIPS:
Now we have to do our lips, as this makeup is sort of natural because it doesn't have any harsh colors or lines, we wanna keep our lips also as natural as possible;
Tip to make our lip color last longer: apply a little bit of it can be foundation or maybe primer. 
1. After applying foundation and let it dry a little bit put on some lip balm. 
2. Then just apply some kind of pinky really light shade. 
3. To finish just touch your lips with your fingers so it would blend with the foundation that we put earlier.


Tuesday, July 22, 2014

DIY for glowing skin

I know we love to wear makeup, i really do, but this can make our skin loose his glow, and that's something we absolutely don't want, cause what we really want is to look really good with and without makeup. So I have been researching and i found some remedies with things that we already have in our kitchen.


so here we go, the first one is a quick face mask; mix papaya pulp, two tablespoons of milk and one tablespoon of honey. never skip the honey because it's so hydrating. this will leave a dewy glow.


To decrease any kind of inflammation on our face and also to soften skin; mix 10 blueberries and 1 tablespoon plain yogurt, put in on the face and leave for 15 minutes.


Some of us have sensitive skin, and some things would make us have a lots of break outs in our skin and we really don't want this, so i found this all-natural face mask, made from honey, nutmeg and cinnamon, just use 1 tablespoon of each ingredient; mix well and leave on for 30 minutes wash off and go to bed.


Wednesday, July 16, 2014

How to look better in winter


I know that when it's really cold wear like layers and layers of clothes, and we actually feel like we are a polar bear; I've also heard people saying like you can only look sexy with just little clothes, but that's complete wrong! You just have to combine the right clothes and add details with style to the look. So here we go:


The coat: This should definitely have one in your wardrobe, this would make highlight your whole outfit; maybe you can have in different colors.


Scarf: When they are big, and you wear them loose, would make you look thiner because the vertical lines stylize and lengthen your figura. You could wear them with a fitted jacket, skinny jeans and boots.


Trenches: this are all in this season; they serve both like to go to the office or for a casual jean outfit.


Knee High Boots: This are the last trend this fall/winter 2014; they are sexy but also keep you warm a lot, and you can wear them with a short dress or maybe over your skinny pants.


Skirt: who said they were only for summer? nono, they look really good with tights, the easiest way is wearing a loose black skirt with black tights, but remember wear something with color if not you are maybe going to look like you are attending a funeral, and we certainly don't want that  


Accessories: We can't forget about this part, never forget to wear earrings, rings, a watch, a hat something. 

Friday, July 11, 2014

Winter makeup

In winter our skin tends to be driest, and we definitely don't want that because that make us look older and it just look really bad to be honest. We need to look somehow glowy, this would show that we can do anything no matter how cold is outside. So here i found some tips that can help us to achieve this.


The first thing is to hydrate our skin; at night before going to bed we need to wash our skin with any kind of facil scrub, i've try the freeman one of grenade and apricot and also st. Ives also in apricot, this facial scrubs are really good but sometimes can be a little expensive thats the only bad thing, also we can use just brown sugar and it would work just as the other ones.


So going back to the point; after washing our face we need to apply some face cream to all of our face; keeping in mind that we need to buy the one that suits our skin, cause if you don't use the right one it would not work. I've been using the Salvatore Ferragamo one. And in the morning before putting any makeup we need to wash our face again or use a cleaning wipes, so your face is going to be really clean and ready for the day.


If your skin is really really dry you should use a illuminating or hydrating primer, before you reach for the foundation. And if you don't want to use so many things in your face we can change the primer for a bb cream, this is much lighter that a foundation but if you don't a lot to cover you can use this without a problem.


Now into the foundation part, forgot the powered minerals and  compact foundations, go for a illuminating liquid formula. 


Bronze, all year product, just use it to give some shape to your face; dust it subtly into the hairline and the high points of the cheeks. And remember save the too obvious contouring for the saturdays night.

Don't powder, this would make you look dry, instead use a liquid highlighter. Just apply a little bit on the tops of your cheekbones, straight down the centre of your nose, on your cupid's bow, underneath your brow bone and on the inner corner of your eyes. But remember just a little bit we don't wanna look like a fairy walking down the street. 


Bold lips; bright lips looks even better in winter than in summer, cause it make you look happy. 


Saturday, July 5, 2014

Who doesn't love braids?

Like the title says who doesn't loves braids, i mean i don't know is its just me or i'm a total weirdo but i'm in love with braids of all kinds, it takes our hairstyle to another level; you can be wearing a total simple outfit and no makeup but if you pair that with a braid hairstyle everybody would be like, OMG its amazing, how much time did it take to you to make that braid, its amazing; and let me tell you a little secret almost all the braids that look really hard to do are the easiest ones to do.


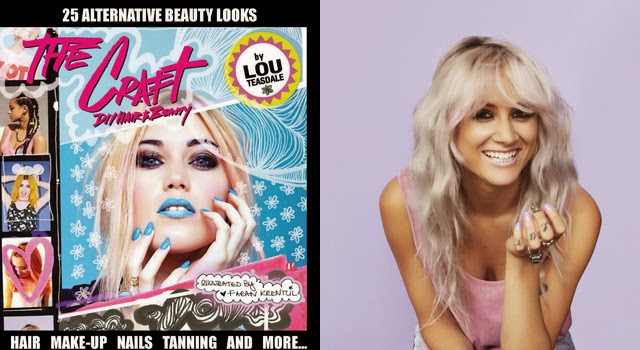
Recently I was searching the internet and i saw that Lou Teasdale has released her first epic new DIY beauty tome, The Craft; and its all about how to make hairstyles, makeup, nails and some more stuff and i said I HAVE TO BUY IT RIGHT NOW,  so i began to search where can i buy it cause at first it was only sold in the UK, later on i saw that amazon was now selling it, so without blinking i bought it. I was looking through the pages ( and let me tell you i'm in love) I saw that there's a whole section for braids and when i was reading i told myself hmmm this are really good advises so i have to share them, so that's what i'm about to do; 4 tips for amazing braids:  


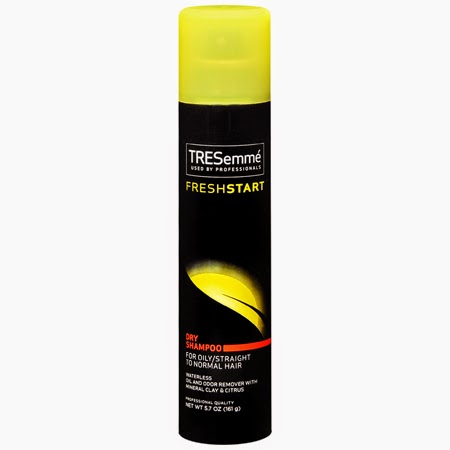
1. Powder is the key; and no i'm not talking about makeup; this is a powder to make our hair a little bit more gritty; is helps to maintain the braid and to last longer. The one that the Lou ( the author) love is fudge urban powder styler, but i know this is a little bit hard to find, so i looked for something similar that can give us the same result and is dry shampoo just spray a little bit of this on your hair and it would give you automatically a lot of texture and a gritty look and the last option is that if you don't want to spend money it would work to is you leave your hair to dry alone and making the braid the next day.


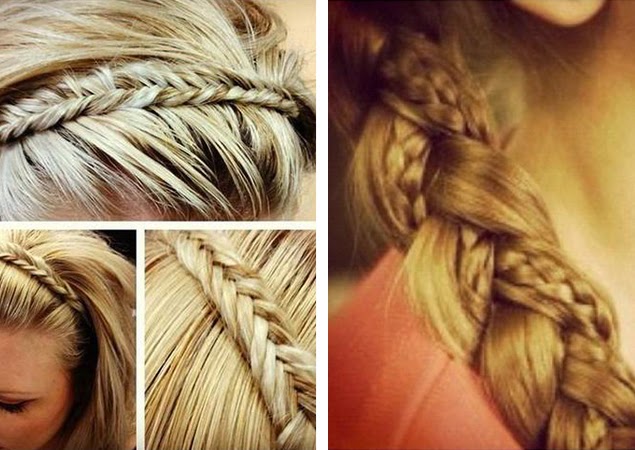
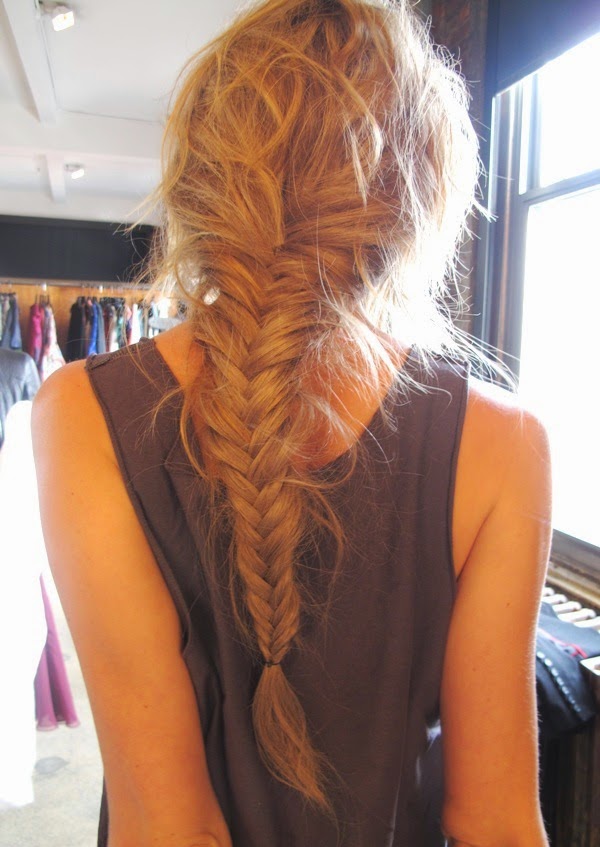
2. Three steps; fishtail braid: step one - split your hair into two big sections. Step two - take a thin strand from the outside of the right section and cross it over to join the left, then take one strand from the left and bring it to join the right one. after that repeat until the end. Third step - tied the braid and don't forget to mess it up tons and tease it apart, this would make it look more effortless and beautiful

3. Add some color: use hair chalks, this is a cool and temporary way to give some color to your hair, without the commitment of dying for hair for a long time and you can experiment with different colors. The way to use this is to first make the braid and then add the color, for example i when i make this i use the Rita Hazan pop color sprays in pink ( they have in blue and purple too, this is an amazing product, it really leave the color or the bottle in your hair no matter if you have blonde or black hair) and after you spray some parts of the braid you can twist it up into a milkmaid style or a fun braided up-do to make it look cohesive .


4. Just go to sleep!: as you can see the last tip she gives us is to just go to sleep, before going to bed just spray your hair with some sea salt spray, she recommends the fudge urban salt spray, but this one is a little bit hard to find is you don't live in the uk, so i found another one that its a little bit easier to find and is the Not your mother's sea salt spray. well going back to the braid is that you spray it and make two braid, the next morning just take the braids out shake a little bit your hair and you would end up with a really pretty, wavy texture! as simple as that.